
In a previous blog I wrote about getting started with Serverless. We built a hello-world kind of app and deployed this to our Cloud Instance focusing on setting up the serverless yaml.
So now let’s have a look at setting up the development environment, with things like initializing npm and TypeScript on this project. We are starting with an npm init command in the command line. After answering some questions on the command line (or accepting the defaults) you should see a summary and hit enter (yes).

The main thing that happened, is that you now have a package.json file in your folder structure. So now we have a package.json and npm tools available. I like to also init TypeScript, since I prefer TypeScript over plain JavaScript on my projects. So first let’s install with npm i typescript. After installing TypeScript, we are running the init on the project with: tsc --init. This generates a tsconfig.json file.
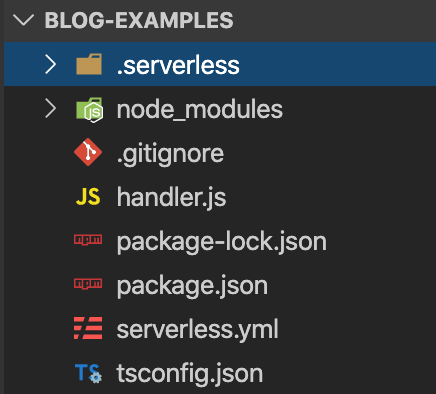
After the two initialisations on the project, we see a couple of files have been added:
The tsconfig.json file is for configuration, for example let’s change something small here and set the outDir configured to ‘dist’. Now it is time to start using TypeScript instead of JavaScript. I also like to add a folder ‘src’ where my source files are. We move the handler.js to this folder and will change the extension from handler.js to .ts, in the message I added ‘Your typescript function executed successfully!‘ so we can see that it worked.

With the command tsc (TypeScript compile) you can compile your TypeScript code to a .js file. However, we would prefer to use the more common npm build command. To do this, we can add a build script in the package.json. In the scripts section we add: "build": "tsc". So now on the command line we can run npm run build.


This will run tsc and create a dist folder with the .js file.
Now remember that in the serverless.yml we have set the handler to handler.hello. We need to add the directory in front of this now, so this should be changed to dist/handler.hello.
To see if everything is still working correctly, we do an sls deploy to redeploy our serverless project to AWS. After this, we do a curl to the endpoint and get our success message:

Last but not least it is a good practice to ‘set up linting’. For this we start with installing eslint with npm i eslint, after which we do an npx eslint --init to initialize eslint on our project. The npx command makes sure you run the local library in your node_modules.
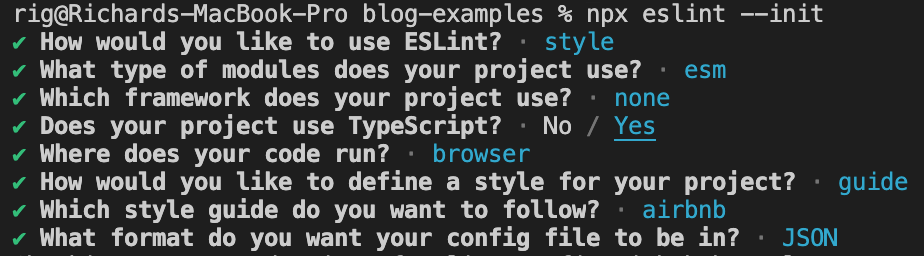
Answer the questions any way you like, above is just an example of what you can choose, but not necessarily a recommendation. So depending on the output you have selected, in this specific case I decided on JSON, a ‘.eslintrc.json’ file is added to the folder structure.
To run eslint on the whole project for all TypeScript files, you can use the command npx eslint src --ext .ts. But I’d rather put this in a script as well. So I add a script with the name eslint in the package.json. The beauty of putting this in the package.json is that we can now call the eslint from the build command as well, making sure when we build our code it is also linted. I changed the build script to "build": "tsc && npm run eslint". And now we can rerun an npm run build command.
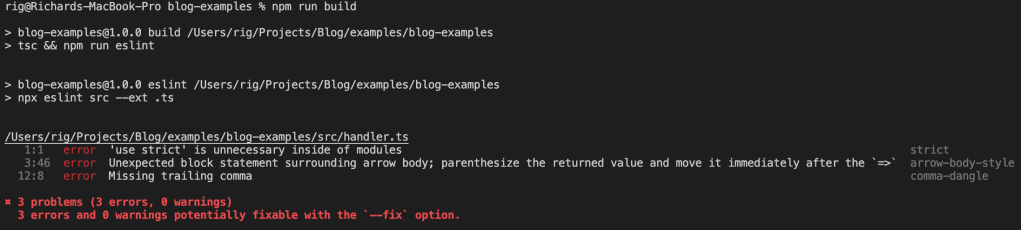
This shows us 3 problems and the build fails! You can manually change some rules if you disagree, or you can change your code. To make the code compliant again, you can use the following:
module.exports.hello = async (event: any) => ({
  statusCode: 200,
  body: JSON.stringify(
    {
      message: 'Go Serverless v1.0! Your linted typescript function executed successfully!',
      input: event,
    },
    null,
    2,
  ),
});
Just to be totally sure everything works as expected, after the npm run build we can do an sls deploy again. Or if you like, you can create a deploy script within the package.json that runs sls deploy so you can run npm run deploy.
After this, we do another curl to the endpoint and we see the linted code has been deployed.

